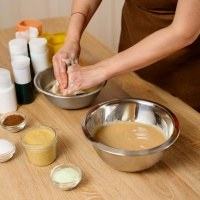
Cold process soap making is called cold process because saponification takes place without the use of a heat source — nevertheless, the soap has a relatively high temperature during the saponification process. The main advantage of this method is the possibility of colouring and thus creating various patterns in the final soap; a minor disadvantage is the curing time of the soap. We will take you through the whole procedure step by step, together with a video tutorial and the recipe we used in it.
About this recipe
This process is called cold process because the saponification process takes place without the use of a heat source. Nevertheless, the soap has a relatively high temperature during the saponification process.
The main advantage of this method is the possibility of colouring and thus creating various patterns in the final soap. A minor disadvantage is the curing time of the soap: in order to evaporate the residual water in the soap, it is necessary to let the soap rest for 2 – 4 weeks so that the water evaporates and the soap remains beautifully hard. The harder the soap, the longer it will last in the bathroom.
We describe the production in more detail in the attached video — below you will also find the exact recipe we used in it.
Main benefits
- Colours and patterns
The main advantage of this method is the possibility of colouring and thus creating various patterns in the final soap.
- No heat source
The saponification process takes place without the use of a heat source — nevertheless, the soap has a relatively high temperature during the saponification process.
- Hard soap that lasts
After 2 – 4 weeks of curing, the residual water evaporates and the soap remains beautifully hard. The harder the soap, the longer it will last in the bathroom.
- Composition according to the recipe
You choose the oils, butters, waxes, essential and fragrance oils and colourants according to the recipe — the composition of the oil phase is not fixed.
Product properties
Key raw materials in the recipe
To make soap by the cold process you will need protective equipment — goggles, gloves, a digital scale, bowls, a spatula, spoons, an immersion blender, a soap mould, pH strips, sodium hydroxide (you can buy it commonly in a drugstore), demineralised water, oils, butters, waxes, essential or fragrance oils and colourants. Below we go through the raw materials we used in the video and their role in the recipe.
Sodium hydroxide
Without sodium hydroxide, saponification will not take place — preparing its solution is the first step of production. You can buy sodium hydroxide commonly in a drugstore; in the video we weighed out 28.5 g of it. It is precisely because of working with it that protective equipment — goggles and gloves — is essential.
Demineralised water
Together with sodium hydroxide, demineralised water forms the solution that is combined with the oils in the next step — in the video we used 76 g of it. It is precisely the residual water that is the reason why the soap needs to rest for 2 – 4 weeks: only once it has evaporated does the soap remain beautifully hard.
Olive oil, pomace
Olive oil — pomace has the largest share of the oil phase in the recipe from the video, 90 g. The composition of the oils depends on the recipe: besides olive (pomace), coconut, castor or sunflower oil are used.
Coconut oil
Coconut oil is the second most represented oil in the recipe from the video — we weighed out 60 g of it. Together with the other oils and butters it forms the oil phase, which is combined with the lye solution in the third step.
Cocoa butter
From the butters we included cocoa butter in the recipe from the video, namely 20 g. Besides cocoa butter, mango butter, for example, is also used in soaps — again it depends on the specific recipe.
Other raw materials and equipment
Sunflower oil completes the oil phase of the recipe from the video, in an amount of 30 g.
Essential oil — blood orange was added to the soap in an amount of 20 drops. Instead of essential oils you can also reach for fragrance oils.
Mica — various colours is used to colour the soap and is dosed as needed. The possibility of colouring and creating patterns is the main advantage of the cold process.
Waxes, beeswax for example, are another ingredient you will come across in cold process soap making — whether you include them depends on the recipe.
pH strips are only needed at the very end, after 2 – 4 weeks of curing, to check the final pH of the soap.
Soap mould is the last essential — the soap mixture is poured into it for 24 hours of saponification. Besides that, prepare a digital scale, bowls, a spatula, spoons, an immersion blender and protective goggles with gloves.
The recipe — what we used in the video
The amounts are given exactly as we weighed them out in the video — 304.5 g of weighable raw materials in total. The essential oil is dosed in drops and the colourant as needed.
| Phase / raw material | Amount |
|---|---|
| Lye solution | |
| Sodium hydroxide | 28.5 g |
| Demineralised water | 76 g |
| Oils and butters | |
| Coconut oil | 60 g |
| Cocoa butter | 20 g |
| Olive oil — pomace | 90 g |
| Sunflower oil | 30 g |
| Fragrances and colourants | |
| Essential oil — blood orange | 20 drops |
| Mica — various colours | As needed |
| Equipment | |
| pH strips | — |
| Soap mould | — |
The procedure
The basic steps of cold process soap making are:
- Preparation of the lye solution Lye solution
Weigh out the sodium hydroxide and the demineralised water and prepare a solution from them. Work in protective goggles and gloves.
- Preparation of oils and butters Oils and butters
Weigh out the oils and butters according to the recipe — in our case coconut oil, cocoa butter, olive oil (pomace) and sunflower oil.
- Mixing the oils with the lye solution — creating trace
Combine the oils with the lye solution and blend with an immersion blender until trace forms.
- Adding fragrances and colourants Fragrances and colourants
Add the essential oil to the mixture (in our case 20 drops of blood orange) and mica colourants as needed — this is exactly where the colours and patterns are created.
- Pouring into the mould 24 hours
Pour the mixture into the soap mould, where the saponification process runs for 24 hours.
- Cutting the final soap
After saponification, take the soap out of the mould and cut it into bars.
- Curing process 2 – 4 weeks
Leave the soap to rest for 2 – 4 weeks so that the residual water evaporates and the soap remains beautifully hard.
Video tutorial
We describe the production in more detail in the attached video.
Measuring the final pH
After 2 – 4 weeks it is time to measure the pH of the final soap. Moisten a piece of soap with water, apply a pH strip and compare it with the scale that is attached directly to the packaging of the pH strips. The soap should have a pH lower than 9.5.
Frequently asked questions about cold process soap making
Practical questions about the cold process — why it is called that, how long the soap cures, what pH it should have and what to prepare before you start.
Why is the process called “cold”?
Because the saponification process takes place without the use of a heat source. Nevertheless, the soap has a relatively high temperature during the saponification process.
How long does the soap have to cure?
2 – 4 weeks. This is about evaporating the residual water in the soap — the soap needs to be left to rest so that the water evaporates and the soap remains beautifully hard. The harder the soap, the longer it will last in the bathroom.
What pH should the finished soap have and how do you measure it?
The soap should have a pH lower than 9.5. After 2 – 4 weeks, moisten a piece of soap with water, apply a pH strip and compare it with the scale that is attached directly to the packaging of the pH strips.
Why is the cold process suitable for colouring and patterns?
It is precisely the possibility of colouring and thus creating various patterns in the final soap that is the main advantage of this method. The colourants are added together with the fragrances before pouring into the mould.
What equipment and raw materials should I prepare?
Protective equipment — goggles and gloves, then a digital scale, bowls, a spatula, spoons, an immersion blender, a soap mould and pH strips. As for raw materials: sodium hydroxide (you can buy it commonly in a drugstore), demineralised water, oils (olive pomace, coconut, castor, sunflower — depending on the recipe), butters (cocoa, mango), waxes (beeswax), essential or fragrance oils and colourants.
When is the soap cut?
After pouring into the mould, the saponification process runs for 24 hours — only then does it come to cutting the final soap, followed by 2 – 4 weeks of curing.
You will find the demineralised water, sodium hydroxide, oils, butters, essential oils and mica colourants from this video tutorial in the Handymade range.